Showing posts with label Tutorials. Show all posts

Restore Your iPhone By Using iCloud App With The Previous Backup

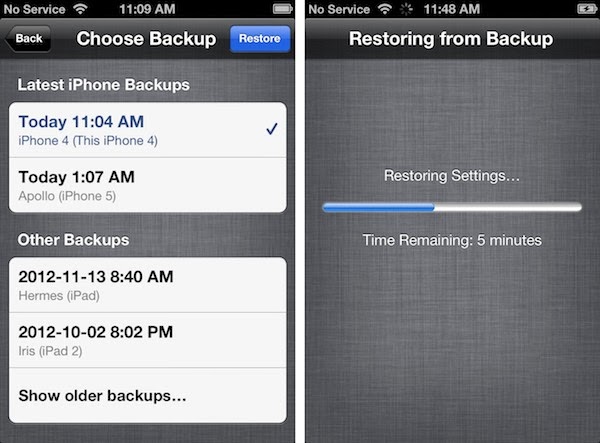
In the previous post, I had a post that how to backup your device by using iCloud app. And now, if you want to restore with this backup, you can follow this tutorial. Restore iPhone By Using iCloud App With The Previous Backup.

1. Click “Start” and navigate to “All Programs” and find the Apple/iTunes menu on a PC. Mac users simply need to go to the “Applications” folder and select the iTunes icon.

2. Select the iPhone tab once inside iTunes and on the “Devices” menu, click “Summary” and select “Restore”. This will restore the iPhone back to its original factory settings first before it asks you to confirm where to get the next information from.

3. After that initial restore, click the Restore from backup check box and a setup prompt will follow.

4. The final step is to select the date of the backup that you desire and click “Continue”.

Restore iPhone Using iCloud App
When the proccess finishes successully, all apps and information will be restored as its previous status. Have fun! 

iOS 7 Cydia Substrate Released

The Mobile Substrate 0.9.5000 for iOS 7 and 64-bit A7 chip, which renamed Cydia Substrate has been released. That was an update for Mobile Substrate of Jay Freeman (saurik).

iOS 7 Cydia Substrate
As saurik has mentioned with support for iOS 7 and ARM64 update, Cydia developers will now be able to make their compatible with iPhone 5s, iPad Air or Retina iPad mini by recompiling their tweaks for ARM64. For extensions to work on ARM64, they must be recompiled to ARM64 first.

Remember that the new version of Mobile Substrate will only work on iPhone 5s and other A7 devices when the developers release an update for their tweaks with 64-bit compatibility. So please be patient with their next releases.

You can follow the steps below to install Cydia Substrate (the different name of Mobile Substrate).

- Launch Cydia

- Tap on the Search tap, and search for Cydia Substrate

- Tap on Cydia Substrate from the search results

- Then tap on the Install button, followed by the Confirm button.

- Tap on the Restart SpringBoard button when prompted

It will take a few minutes to complete the installation. I wish you to have a wonderful experience with Cydia Substrate.

Backup And Restore iPhone Easily By Using iCloud App

If you want to upgrade your iOS device to a higher version, I think you should backup your devices. Because if you have a problem with this upgrade, you can restore your system with the previous backup. It is really necessary for every change you make to your IOS device. It is important to give your iPhone frequent backups so that all your personal data remains secure. In case of any emergency, you can restore all the apps, photos, numbers and all the personal information from another source if you have a good backup iPhone data. It seems to be a best way to transfer all the data of an old iphone to the new device. You can also backup iPhone data in a computer.

Backup iPhone By Using iCloud App.

Using iCloud App to backup iPhone
iCloud is the best cloud apps you can use to backup your iphone. It really provides a convenient user interface. But you should remember that your device has access to Wifi can be allowed to make a cloud backup. Because of the cloud, your device can only start creating a backup when it is on a WiFi network and it has been plugged into a socket. I think you should plug the iPhone into a power source because the backup service consumes a lot of battery power. The process will sync old data with new data at the moment.

With iCloud, the Apple user can access the apple servers and use different devices to access data that they had previously saved. Additionally, you can access any thing that has been saved on cloud backup from anywhere in the world.

Note: you must have to configure the iPhone to use iCloud account and you must have enough space for a successful backup process.

And now, you can backup your iPhone by using iCloud App after reading the steps below.
Using iCloud App to backup iPhone
1. Make sure that the phone has been plugged directly to a power source.

2. Ensure that there is a WiFi network within range and connect to it.

3. Run settings.

4. Select iCloud and then choose the “storage and backup” menu.

5. Select and confirm the “backup now” query to begin a new iPhone backup.

Good luck to you!

Unlock iPhone 5 Running On iOS 7 Beta By Using The IMEI code

The iPhone 5 users, who have upgraded their smartphone with the beta version of iOS7, now can easily unlock their devices. It is a great news. However, there is no jailbreak available for the latest firmware. They just unlock iPhone 5 by using the IMEI code.

Unlock iOS 5 with IMEI Code
IMEI Code
In this way, they needn't a jailbreak iOS device but it does not void the device of its manufacturer's warranty.

You can follow our step-by-step to safely unlock iPhone 5.

Step-1: First choose a trusted company that performs official factory iPhone unlock using IMEI number from this link.

Step-2: Now re-check the carrier name the iPhone is locked to and its IMEI code from this link.

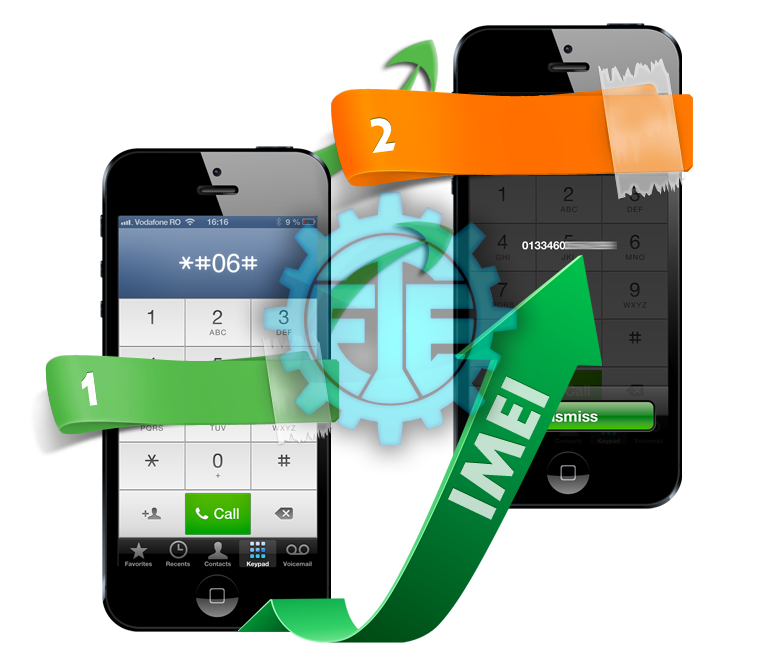
Step-3: Find the iPhone IMEI by dialing *#06#. Also, IMEI can be found by navigate to Settings>> General>> About>> IMEI 

Step-4: Provide this information to the official unlocking company to start the unlocking process. Wait for some time. Users will now get an email saying unlock confirmation for the handset 

Step-5: Connect the iPhone to the computer using USB cable

Step-6: Open iTunes and wait for some time until it detects the device

Step-7: Now a congratulatory message saying the iPhone has been unlocked will appear

Unlock iOS 5 with IMEI Code
Unlock IPhone 5 successfully
The iPhone 5 running on iOS 7 beta should now be unlocked using the IMEI number. It can take 24 hours for companies to perform iPhone unlock your devices completely with IMEI Code. We wish you unlock iPhone 5 successfully by this way. Tags: unlock,iphone 5,unlock iphone 5,iOS 7,IMEI Code.

Untethered Jailbreak iOS 7 With Evasi0n7 On MAC

Step 1: Download evasi0n7 for Mac via evasi0n.com, and extract the package.

Untethered Jailbreak iOS 7 With Evasi0n7 On MAC

Step 2: Double click the evasi0n7 app to run it.

Step 3: If your device has a passcode set, unlock your device and go to Settings > General > Passcode Lock > and select Turn Passcode Off.

Step 4: Plug in your iDevice to your computer, and wait for evasi0n to recognize it.

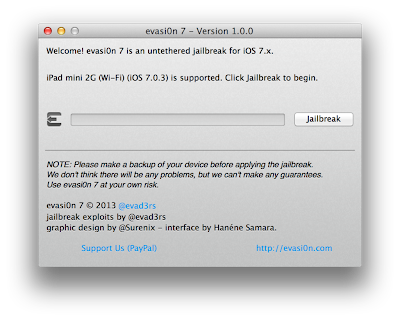
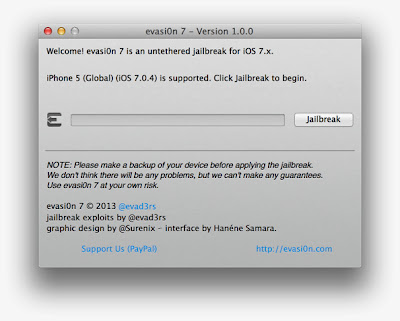
Step 5: You should see a message on the tool that it has detected your device, and the Jailbreak button should become clickable.

Step 6: You’ll then click that button, and sit back while the app does its thing.

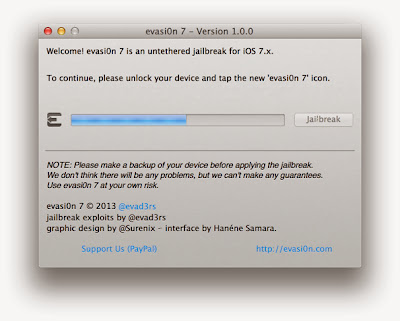
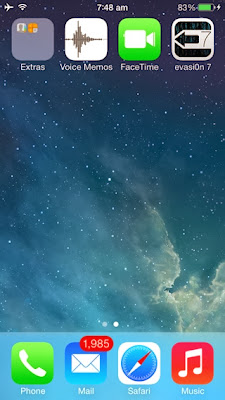
Step 7: Finally, you’ll be asked to tap the evasi0n7 icon on your device’s Home screen

And that’s all there is to it. The entire process takes around 5 minutes, and your device will reboot a few times. If the process gets stuck at any point, it’s safe to restart the program, reboot the device (if necessary by holding down Power and Home), and rerun the process.

It’s worth restating that Saurik was caught by surprise, as we all were, with this release, so he hasn’t had the chance to test things out yet. As such, we imagine you’ll run into issues with both Cydia and your favorite tweaks, so be prepared for initial compatibility issues.

Anyway, if you have questions, concerns, or comments, then please leave your feedback in the comment section below. Please be willing to help your fellow jailbreakers as you’ve been so eager to do so in the past. You can read the Windows Tutorials in the previous post: Untethered Jailbreak iOS 7 With Evasi0n7 On Windows
.

Untethered Jailbreak iOS 7 With Evasi0n7 On Windows

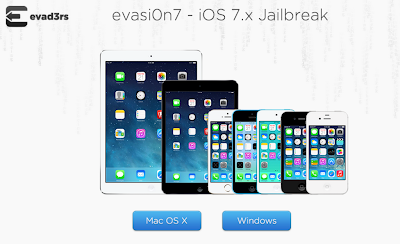
The evad3rs have released a new jailbreak tool called evasi0n7, and it allows you to easily jailbreak iOS 7. The good news is that the hack works with all flavors of iOS 7, which includes iOS 7.0.1, iOS 7.0.2, iOS 7.0.3 and 7.0.4 (and it looks like iOS 7.1 beta).

As usual, the evad3rs have made the utility fairly easy to use. But also as usual, we know there will be folks out there looking for a bit of help using it, so we’ve created an easy-to-follow tutorial to show you how. This is our Windows guide (our Mac guide can be found here)


Note: Again, this jailbreak is only compatible with compatible with iPhone, iPod touch, iPad and iPad mini models running iOS 7.0 through 7.0.4. That means it won’t work on the Apple TV or any devices running iOS 6.x. Also, you’ll want to make sure that you backup your device using iCloud or iTunes. And for those of you who have updated via OTA, you’ll want to back it up in iTunes and do a full restore before applying evasi0n7.

Step 1: Download evasi0n7 for Windows on evasi0n home page (evasi0n.com)

Step 2: Extract the download onto your desktop and open the evasi0n folder. Right click on the evasi0n.exe file and select Run as administrator. If a User Access Control window pops up, choose yes.

Step 3: Make sure your device passcode is disabled, if you ever set one up. To disable your passcode lock, go to Settings > General > Passcode Lock > and choose Turn Passcode Off.

Step 4: Plug in your iDevice to your PC.

Step 5: You should see a message on the tool that it has detected your device, and the Jailbreak button should become clickable.


Step 6: To begin the jailbreak process, click that button and sit back and let the app do its thing.


Step 7: Eventually, you’ll be asked to tap the evasi0n7 icon on your device’s Home screen, which will complete the process. 


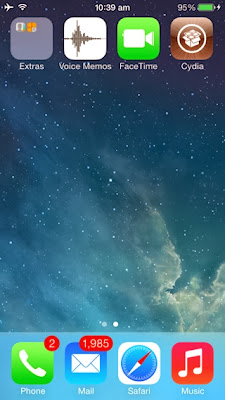
Step 8: Once the jailbreak process has completed, you’ll be taken to your Lock screen. From there, you can Slide to unlock your device and where you’ll find the Cydia icon on your Home screen’s second page.


And that’s all there is to it. The entire process takes around 5 minutes, and your device will reboot a few times. If the process gets stuck at any point, it’s safe to restart the program, reboot the device (if necessary by holding down Power and Home), and rerun the process.

It’s worth restating that Saurik was caught by surprise, as we all were, with this release, so he hasn’t had the chance to test things out yet. As such, we imagine you’ll run into issues with both Cydia and your favorite tweaks, so be prepared for initial compatibility issues.

Anyway, if you have questions, concerns, or comments, then please leave your feedback in the comment section below. Please be willing to help your fellow jailbreakers as you’ve been so eager to do so in the past.

TOP Best Cydia Sources List

For finding best jailbreak tweaks, games or themes you need to have top cydia repos or sources added to Cydia app on your jailbreak iPhone, iPad or iPod Touch. Behold and go through our list of best cydia sources


ModMyi

ModMyi is truly meant for users who want to modify their jailbroken iOS devices since this repos is packed with packages which includes tweaks, soundboards, ringtones and wallpapers.

http://apt.modmyi.com

iHackStore

Looking for cracked tweaks? iHackStore is for you since it contains a huge number of tweaks, wallpapers, themes, ringtones, mods and much more and majority of them are cracked.

http://ihackstore.com/repo

iF0rce.com

iF0rce repo only contains iOS tweaks. The popular jailbreak tweak AirBlue sharing is from this repo which lets you transfer files between Nokia, Samsung and other iOS devices.

http://apt.if0rce.com

BiteYourApple

BiteYourApple is famous Italian cydia source. The popular cydia tweaks from this source includes iFile, Springtomize 2, Celeste and few others.

http://repo.biteyourapple.net

HackYouriPhone

HackYouriPhone is yet another Cydia repo with majority of tweaks related to apps, jailbreak tweaks, ringtones and themes. The apps on this cydia are updated with new jailbreaks and apps.

http://repo.hackyouriphone.org

iHacksRepo

Here is another repo which jailbreak users can’t afford to miss. Here you will find number of winterboard and dreamboard themes, ringtones, utilities and SB Settings themes.

Http://ihacksrepo.com

xSellize

For games, XSellize is must is cydia repo. In this repo, you will find number of games, rom packs for game systems like Game Boy Advance, Nintendo 64 etc.

Http://cydia.xsellize.com

Hackulous

Hackulo.us is for sure the most famous repository available. The main reason for its popularity is that it hosts installous which is app to download unauthorized apps for free.

Http://cydia.hackulo.us

Insanelyi

Insanelyi hosts more that 6500 packages and number of new packages are added to it on daily basis.

Http://repo.insanelyi.com

SiNful iPhone Repo

SiNful is another famous Cydia repo in the jailbreak community. If you are looking for cracked apps or games, then you should add this repo to your cydia app because it contains a great amount of apps, tweaks, themes, mods and ringtones.

Http://sinfuliphonerepo.com

This was our list of top ten 10 cydia sources of 2013. We hope you enjoyed it a lot. If we have missed any good Cydia Repo or source which deserves to be in this list, then do let us know in comments, we would be happy to update it.

Add a source to Cydia Tutorial

The first, you have to Jailbreak your iPhone. See more in the previous post.

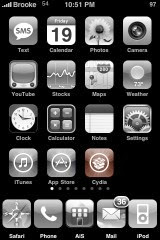
When you jailbroke your iPhone, iPad or iPod Touch, the Cydia application was added to your device automatically. It was added to your iPhone/iPod Touch’s SpringBoard with the rest of the stock applications like Calendar, Maps, Weather etc. Cydia is what you use to add more applications (games, utilities…) to your iPhone

When Cydia is added to your iPhone or iPod Touch, it only has a few sources installed. A sources is a web address linked to servers where the applications are downloaded from. For example, the BigBoss source will have different applications than the iSpazio source. If you want an application that is in the iSpazio source, you will need to add that source to Cydia.

Once a source is added to Cydia, all the applications in that source will show up in Cydia as applications available to be added (installed) on your iPhone or iPod Touch. You can find a list of all the available sources on our Cydia Source List.

There are two ways to add sources to Cydia. The first is to install them through Cydia itself. The second is to manually add the source to Cydia yourself. Below is step-by-step guide for both.

Step by Step By Guide

Installing a Source in Cydia:

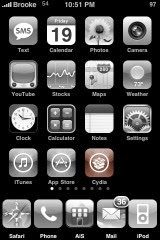
1. Find the Cydia application on your iPhone’s SpringBoard.


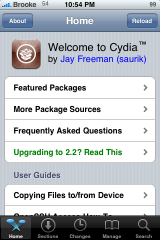
2. Tap on the Cydia icon. This will open the Cydia application.


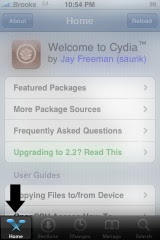
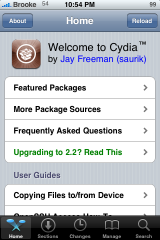
3. Select the Home option on the lower menu bar (Cydia most likely opened to the Home page automatically).


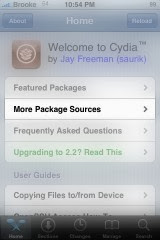
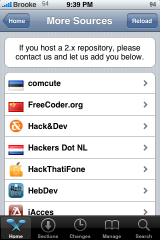
4. Select the More Package Sources option.


5. This will open a list of all the sources that are available to be installed through Cydia.


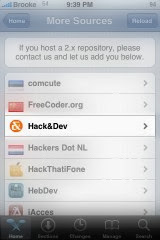
6. Tap on the source you would like to install.


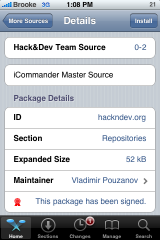
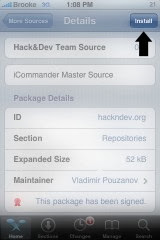
7. This will open the information page for that source. It will include the source title, the version number for the source, the source ID, the section the source belongs to, the maintainer of the source, whether or not the package has been signed, and more information about the source. To install the source, select Install in the upper right corner.


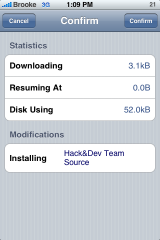
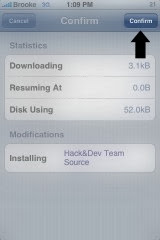
8. This will bring up a pop-up window in which you will need to confirm that you would like to Install the source. You can do so by selecting Confirm in the upper right corner. You can also choose to Cancel the install by selecting Cancel in the upper left corner.


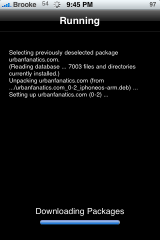
9. Wait for the source to Install.


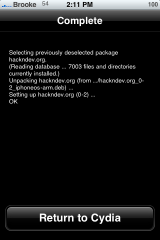
10. Once the source is finished installing, select the Return to Cydia option at the bottom of the page.


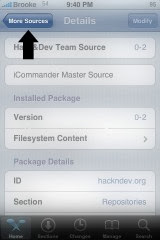
11. This will bring you back to the source information page. You will want to select More Sources in the upper left corner.


Manually Adding a Source to Cydia:

1. Find the Cydia application on your iPhone’s SpringBoard.


2. Tap on the Cydia icon. This will open the Cydia application.


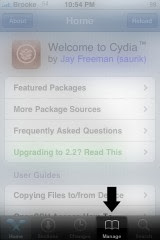
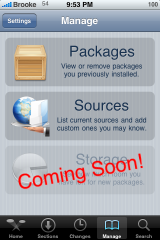
3. Select the Manage option on the lower menu bar.


4. Here you will see two options; Packages and Source. You will want to select the Sources option.


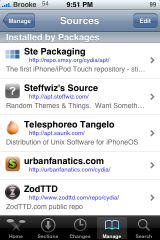
5. This will bring you to the list of sources that are already installed on your iPhone or iPod Touch.


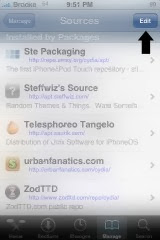
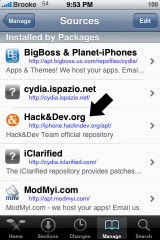
6. To add a new source, select Edit in the upper right corner.


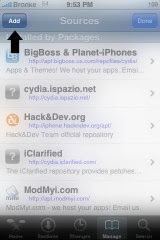
7. Now select Add in the upper left corner.


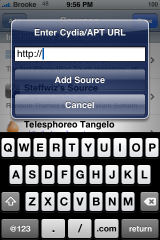
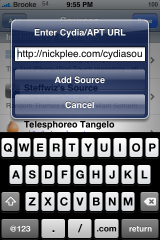
8. This will bring up a pop-up in which you can enter the url for the source. Do not delete the http://. Just begin typing the url after the http://. The source url needs to be typed into your iPhone/iPod Touch perfectly. Make sure if there are capitol or lower case letters in the url, that you enter them into your iPhone exactly the same. Be careful to watch for words that your iPhone might automatically capitalize that are not capitalized in the url.


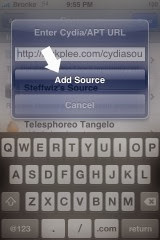
9. Once the url has been entered, select Add Source.


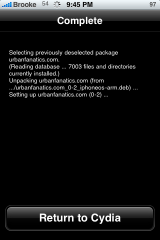
10. Wait for the sources to update.


11. Once the sources are finished updating, select the Return to Cydia option at the bottom of the page.


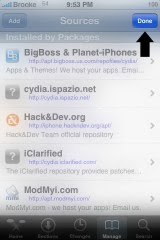
12. This will bring you back to the list of sources. Select Done in the upper right corner.


13. The source has now been added to your sources list and the applications in that source have been added to Cydia.
Jailbreak iOS 5 Tutorial

What is tethered, untethered and semi tethered jailbreak?

As previously posted, tethered jailbreak is that jailbreak where you’ll need to plug in your iPhone into your computer every time the device reboots. Untethered kills that problem and allows you to reboot without any issues. Semi tethered closes the gap between the previous ones, it allows you to reboot without any problems but you won’t get control over some apps (especially those downloaded jailbreak apps). However you can get full access again once you connect it to your computer.

MuscleNerd has confirmed that the current redsn0w tool can jailbreak iOS 5 tethered not untethered.

NOTE: iPad 2 is not supported in this jailbreak. Jailbreak iPad 2 is supposed to be jailbroken within few days along with the iPhone 4S bringing untethered iOS 5 jailbreak.

Jailbreak iOS 5 Tutorial

STEP 1: Download the required files:


 - iOS 5 for your iPhone, iPad or iPod touch (Apple.com)

 - Redsn0w 0.9.9b7 (Windows - MAC)

STEP 2: Connect your device, sync it with iTunes then restore to iOS 5.

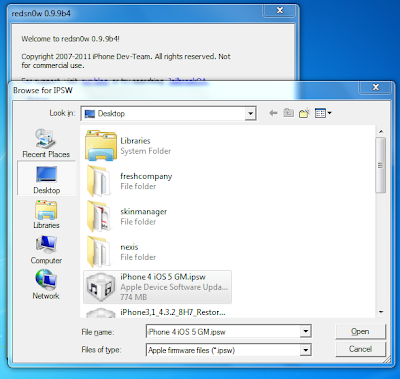
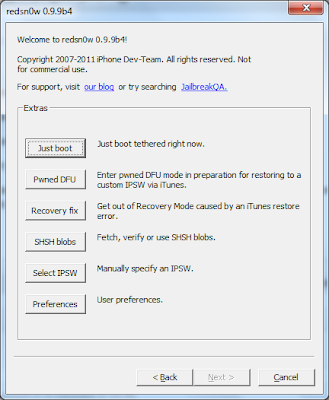
STEP 3: Open Redsn0w, click on Extras, then Select IPSW and point it to iOS 5 IPSW file.


STEP 4: Now hit back, then jailbreak and check on “Install Cydia”.

STEP 5: Follow the on-screen instructions to get your device in DFU mode.


You’ll get your device jailbroken within few minutes of installing some important exploits on your iOS device. You’ll get white Cydia icon once jailbroken, you’ll need to make tethered boot to get it working. In future, when you reboot your device, you’ll also need to tethered boot.

Tethered Boot iOS 5

STEP 1: Open Redsn0w, hit Extras then “Just Boot”.


STEP 2: Hit next and then follow the on-screen instructions to get in DFU mode.

Now you’ll be able then to open your device again.